This page will demonstrate how to perform identity proofing and authorize a identity token in the NEMORx application.
Exostar Sign-up
The first step for e-Prescribing is to perform identity proofing.
Step 1. Identity Proofing
Identity proofing is required for all providers planning on e-prescribing medications through NEMORx. To perform identity proofing click the side menu and click the Exostar Sign-Up option. On the Exostar site select the appropriate option and proceed through the Exostar identity proofing process.


- ProviderPass for EPCS (1, 2, or 3-year option) is required for prescribing narcotics electronically.
- If you plan to prescribe narcotics electronically you will select one of these 3 options.
- One-Time Proofing is the minimum required for e-prescribing.
- If you are not planning on prescribing narcotics, select this option.
Once Identity proofing through Exostar has been completed reach out to customer support to request an SPI (Surescripts Provider Identifier). This is required to send electronic prescriptions.
Step 2. Register Token/Device
After performing Identity proofing the token needs to be registered with NEMORx. To register the token with NEMORx, click the side menu and select Register Token/Device. Please note if your credit account has a lock on it, you will need to remove this lock before registering your token.

On the pop up select the Token type you would like to register.

The first time registering a token you will need to the verify the user attempting to register the token and accept the user agreement.
Step 1: Confirm Profile – This step provides the user agreement. This must be accepted to proceed.

Step 2: Verify Identity – This verifies the identity of the person registering the token.
- Part 1 – Register your Mobile phone. You will need the app Authy installed. The link to this application will be sent by text to your mobile device.

- Part 2 – On this screen you will need to enter your name and the license key sent in the purchase email.

- Part 3 – This section verified the person information of the user. Verify all entered information is accurate and correct or enter any missing information.

- Part 4 – This part will verify the user’s identity through information found on their credit report. Please note if there is a credit lock or freeze on your credit account this will need to be removed before performing this step.

Step 3: Register One-Time Password Device – This step registers the devices used for authentication.
Part 1 – This screen is used to register a hardware token. This step is optional and can be skipped. If skipped the hardware token can be registered at a later time.

Part 2 – This screen is used to bind a mobile device (soft token) to the user. A push notification will be sent to the mobile device setup in Step 2: Part 1.


Part 7 – This screen registers your phone with your account. A test message will be sent with a code to be entered. Once the code is confirmed the phone will be registered.


Click complete to be taken back to NEMORx
Step 3. Assign permission to sign narcotics
In order to prescribe narcotics, the permission to sign prescriptions must be turned. Please follow the scenario below that fits your situation.
First provider token registered.
After registering the token, the provider has to set their PIN if this has not been previously completed.
1. Click the side menu and select Profile.
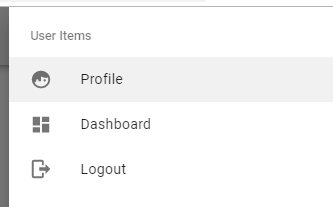
2. On the Profile page click “Set Pin Number” and create a pin (Pin must be 6 numbers)

After setting the pin number the provider needs to give change request permission to at least one user.
1. Click the side menu and select Grant Requests.

2. Enter the user name and click search. Click the + symbol next to change request permission to give the user permission to request a change.

Once a user has been given permission to request changes the user must submit the request to allow the provider to sign narcotic prescriptions.
1. Click the side menu and select Grant Requests.
2. Enter the user name and click search. Click the + symbol next to Ready to Sign permission to submit the request to update this permission and click the + symbol Change Request Permission.

3. This will create the change request which can be viewed by clicking Requests and allow the provider to respond to the change request.

After the change request has been added the provider can approve the change request (note this must be done by the provider)
1. Click the side menu and select Grant Requests.
2. Click Requests and then click Approve to approve the request

After Completing this final step, the provider can now prescribe narcotics.
Second provider token registered.
After registering the token, the provider has to set their PIN if this has not been previously completed.
1. Click the side menu and select Profile.
2. On the Profile page click “Set Pin Number” and create a pin (Pin must be 6 numbers)
After setting the pin number a user with change request permission must submit the request to allow the provider to sign narcotic prescriptions.
1. Click the side menu and select Grant Requests.
2. Enter the user name and click search. Click the + symbol next to Ready to Sign permission to submit the request to update this permission and click the + symbol Change Request Permission.
3. This will create the change request which can be viewed by clicking Requests and allow the provider to respond to the change request.
After the change request has been added the provider with an authenticated token can approve the change request (note this must be done by the provider)
1. Click the side menu and select Grant Requests.
2. Click Requests and then click Approve to approve the request
After Completing this final step, the provider can now prescribe narcotics.
Additional (three or more) provider tokens registered.
After registering the token, the provider has to set their PIN if this has not been previously completed.
1. Click the side menu and select Profile.
2. On the Profile page click “Set Pin Number” and create a pin (Pin must be 6 numbers)
After setting the pin number a user with change request permission must submit the request to allow the provider to sign narcotic prescriptions.
1. Click the side menu and select Grant Requests.
2. Enter the user name and click search. Click the + symbol next to Ready to Sign permission to submit the request to update this permission and click the + symbol Change Request Permission.
3. This will create the change request which can be viewed by clicking Requests and allow the provider to respond to the change request.
After the change request has been added a provider with an authenticated token can approve the change request (note this must be done by the provider)
1. Click the side menu and select Grant Requests.
2. Click Requests and then click Approve to approve the request
After completing this final step, the provider can now prescribe narcotics.